Tuesday, October 27, 2009
The Pioneer Woman can Photoshop!
I stumbled across this blog while looking for Photoshop actions. There is a great post detailing the steps she took in Photoshop to tweak and already cool photo to very, very cool photo status. I love looking at tutorials like this because it breaks it all down into very simple, easy to follow steps! As a Photoshop Noob, I need the baby steps.
Saturday, October 24, 2009
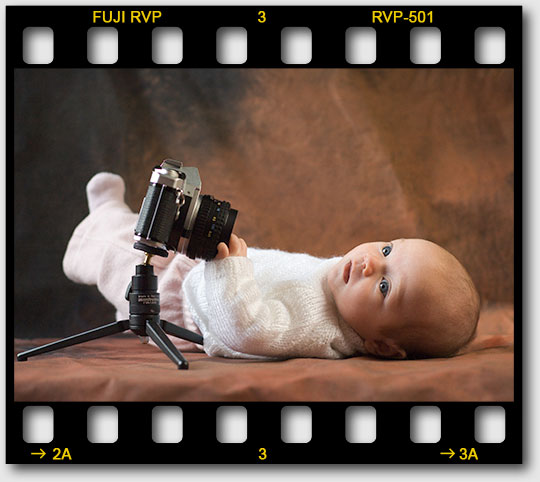
Filmstrip frame tutorial
Friday, October 23, 2009
Copyrights and Watermarks
Here's some good information for creating and applying watermarks to digital images.
Here's a humorous video tutorial by Russel Brown on how to do this: http://av.adobe.com/russellbrown/BrandingSM.mov .
Another method is to create a custom Photoshop brush:
The way I do that so I don't have to keep repeating the process is to create a brush in photoshop that basically stamps my copywrite onto the image where I want in what color or effect. Listed below is the process.
For those that want to do a one step technique for putting copyrights on your images. The easiest way is to make a brush. Below is how it's done.
Just in case you don't know how to create the brush I'll try and walk you thru it.
When you open photoshop click file new and make sure the background content color is set to transparent. You can make the file any size you want but I also put the resolution to 300. I usually do an 8 x 10 for perspective viewing of work. Select your font then you can either do the alt + 0169 or click on the custom shape tool on the side tool bar. if you scroll thru this you'll see the © symbol any other symbol you want.
Next select you text tool and type the name you want next to copyright with the font you want.
If you're happy with it then crop it very tight.
Next two steps important
Click Edit-------then Define Brush Preset
window will come up and you can name it copyright or whatever. When you do though notice the number assigned to it to the left.
Next you'll want to save as (whatever name you want I use Copyright) and make sure is PSD file. You can save anywhere.
Now when you have a photo or image you want your copyright on you just click on your brush tool. Scroll down to the brush number that you saved and click on where you want it. You can do different colors by selecting color before you paint it on and you can also vary the brush size with the slider when you select the brush.
Just go to you picture and click your mouse like you would start to paint and your copyright and signature appears.
Another thing you can do is create a blank layer on your image and when you click on your copyright you can then hit your styles button to do different effects to the signage.
Hope this helps. It's lengthy but well worth it. Practice with different fonts and sizes till you find the one you like. You could even do objects in your copyright like a cats paw or something if you wanted.
Fun to experiment. If you have anymore questions about it I'll try to answer.
Warren
Created by Warren C and found here: http://www.photoshopcafe.com/cafe/viewthread.php?tid=34143.
Tuesday, October 20, 2009
Food, food, food!
Here are a few links to some of the most fabulous food blogs out there, gorgeous food and gorgeous pictures of food - two of my favorite things together!
Once Upon a Plate
Velveeta Ain't Food (search for an apple pudding with keyword "remix")
Blazing Hot Wok
Once Upon a Plate
Velveeta Ain't Food (search for an apple pudding with keyword "remix")
Blazing Hot Wok
Friday, October 16, 2009
The best banana nut bread in the world!
I had some leftover bananas that didn't get eaten, and rather than throw them out, I made banana bread with them. This recipe makes the best banana bread I've ever had!
Banana Walnut Bread
Ingredients
* 1 1/4 cups unbleached all-purpose flour
* 1 teaspoon baking soda
* 1/2 teaspoon fine salt
* 2 large eggs, at room temperature
* 1/2 teaspoon vanilla extract
* 1/2 cup unsalted butter, at room temperature, plus more for preparing the pan
* 1 cup sugar
* 3 very ripe bananas, peeled, and mashed with a fork (about 1 cup)
* 1/2 cup toasted walnut pieces
Directions
Sift the flour, baking soda, and salt into a medium bowl, set aside. Whisk the eggs and vanilla together in a liquid measuring cup with a spout, set aside. Lightly brush a 9 by 5 by 3-inch loaf pan with butter. Preheat the oven to 350 degrees F.
In a standing mixer fitted with the paddle attachment or with an electric hand-held mixer, cream the butter and sugar until light and fluffy. Gradually pour the egg mixture into the butter while mixing until incorporated. Add the bananas (the mixture will appear to be curdled, so don't worry), and remove the bowl from the mixer.
With a rubber spatula, mix in the flour mixture until just incorporated. Fold in the nuts and transfer the batter to the prepared pan. Bake for 55 minutes or until a toothpick inserted into the center of the bread comes out clean. Cool the bread in the pan on a wire rack for 5 minutes. Turn the bread out of the pan and let cool completely on the rack. Wrap in plastic wrap. The banana bread is best if served the next day.
The only problem I had was the bottom tore out a bit when I tried to remove it from the pan. Note to self: line the bottom with parchment next time!
Thursday, October 15, 2009
Halloween
It's almost Halloween, and I've come across some interesting websites and blogs about carving pumpkins. The Pumpkin Lady has some nice video tutorials and patterns. Also, I've become fascinated by those really cool pumpkins that have portraits carved into them. There are some tips to create them and how to carve pumpkins in general at Extreme Pumpkins, Cool Pumpkins, and The Pumpkin Wizard. Of course, I probably won't make any of these, but it's cool anyhow.
Here's a really cool pumpkin pic taken by Brian Mitchell Photography as seen on Flickr:

Here's a really cool pumpkin pic taken by Brian Mitchell Photography as seen on Flickr:

Tuesday, October 13, 2009
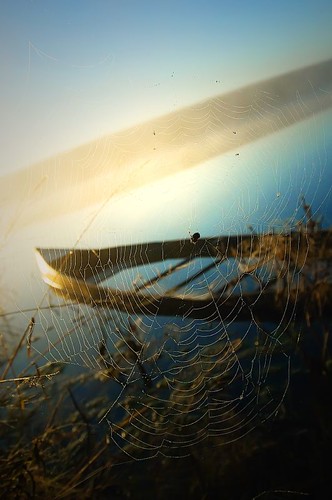
Project 365!!
So, I've heard about this for a while. Project 365. The concept is simple: one picture a day for one year. Cool idea, I hope I can stick with it! I'm not quite sure what I want it to be, but that's kind of the point for me. It's a journey, not a destination. I hope the impetus of taking at least one picture a day will push the photographic envelope for me both in terms of technique and vision. I'll post the pictures here.
Thursday, October 08, 2009
Back to the blog!
I decided to create a new blog, hopefully to host a few photos as a portfolio of sorts. I'm using a very cool looking template called Photoplus, and the directions for how to post the thumbnails are here.
In a nutshell:
Here's the post model:
*do not include spaces* < alt="A description of the image goes here." longdesc="LINK_TO_THE_FULLSIZE_IMAGE" src="LINK_TO_THE_THUMBNAIL">
Note: The thumbnail size should be 187x128 pixels.
In a nutshell:
How to post on Photoplus
Your posts on photoplus should be only an image tag. This means that the title will not be shown on the main page, it has only SEO purposes. Same thing with Labels, It will serve you only to organize the main menu.Here's the post model:
*do not include spaces* < alt="A description of the image goes here." longdesc="LINK_TO_THE_FULLSIZE_IMAGE" src="LINK_TO_THE_THUMBNAIL">
Note: The thumbnail size should be 187x128 pixels.
Subscribe to:
Posts (Atom)